Showing posts with label LED. Show all posts

5 Oct 2018

Forge World Reaver Titan Complete - Astramos of the Legio Crucius Will Walk! (Picture Heavy)

Hi One and All,

Finally, Reaver Astramos will Walk. This God Engine is complete and with that my Reaver Titan project for now is finished. The model is done, with the exception being further marks for engine kills and honours. I have currently opted for a 'clean' look with no weathering, however I might return to add this later.

I have add all the links to previous posts at the end.

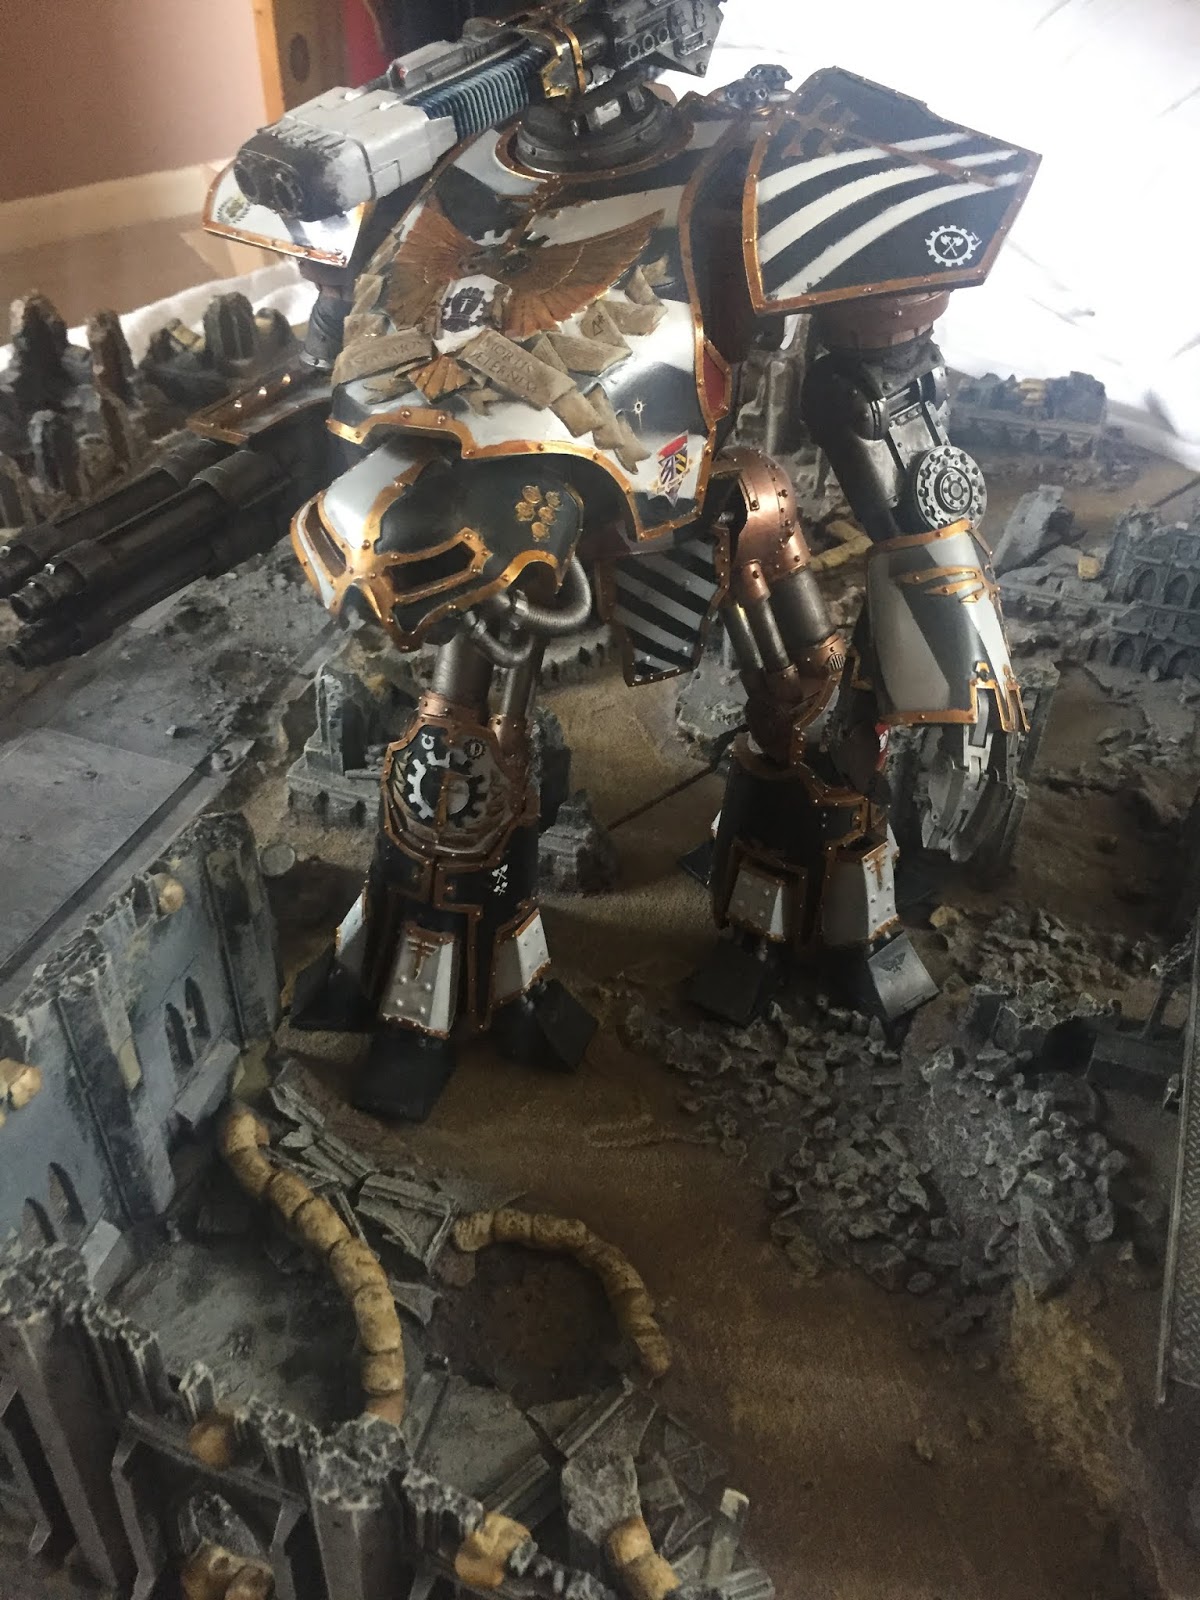
I've taken the pictures of Astramos on the battle board, it adds to the feel of the model. Pictured are all weapon options. The shoulders were built with a nut/bolt to allow for swapping the arm load outs. 

Could this be the load out for the Tamworth battle next weekend?
A nod to the Titan Owners Club, I've made my own transfers for the model and this included the heraldry of the group. 
Engine kills from the TOC Walk UK held at Milton Keynes this June, a Warlord and a Reaver tally. Could there be a few more additions soon?
 The Gatling Blaster and Apocalypse Missile Launcher.
With Plasma Blastgun on the carapace
The Plasma Blastgun is from the Warhound Titan Arm and converted it so that it fits on the Apoc Missile Launcher base unit.
The carapace insignia from home-brew decals as FW didn't do Legio Crucius
 The Power fist. As an UM Marneus Calgar fanboi, it was very tempting to go double fist with the Reaver...
 All the Weapon options.
 Some further details on the leg.
 The number 'XI' is used as the Titan is Reaver No.11 from Forge World and registered at Titan Owners Club.
 Oh, did I forget to mention I'd added LED's to the head?
Wow... what a project. That took a while. Really happy with the results, and its nice to look at something you created over time. I am glad I took the time with build, the planning. I think it paid off with the final look.

Thanks for the support with the project! LH

(100 points to the annual painting total!)
  • 60 Points for the finished Reaver Titan including original 3 weapons
  • 40 points for 4 additional weapons (10 each for Land Raider sized model)
Links for Compilation of Titan Building
https://weemen.blogspot.com/2017/01/reaver-titan-wip-part-1.html
https://weemen.blogspot.com/2017/01/reaver-titan-wip-2.html
https://weemen.blogspot.com/2017/01/reaver-titan-wip-3.html
https://weemen.blogspot.com/2017/01/reaver-titan-wip-4.html
https://weemen.blogspot.com/2017/02/reaver-titan-wip-5-turbo-laser.html
https://weemen.blogspot.com/2017/02/reaver-titan-wip-6-gatling-blaster.html
https://weemen.blogspot.com/2017/02/reaver-titan-wip-6-titan-power-fist.html
https://weemen.blogspot.com/2017/03/reaver-titan-wip-7-comparisons.html
https://weemen.blogspot.com/2017/04/reaver-titan-wip-8-painting-starts.html
https://weemen.blogspot.com/2017/09/reaver-titan-wip-9-update.html
https://weemen.blogspot.com/2017/09/reaver-titan-wip-10-pistons.html
https://weemen.blogspot.com/2017/10/reaver-titan-wip-11-time-to-add-some.html
https://weemen.blogspot.com/2017/10/reaver-titan-wip-12-paint.html
https://weemen.blogspot.com/2017/10/reaver-titan-13-more-paint.html
https://weemen.blogspot.com/2017/10/reaver-titan-wip-14-we-are-going-to.html
https://weemen.blogspot.com/2017/11/reaver-titan-wip-15-steady-progress.html
https://weemen.blogspot.com/2017/11/reaver-titan-wip-16-those-hips-dont-lie.html
https://weemen.blogspot.com/2017/11/reaver-titan-wip-17-slow-and-steady.html
https://weemen.blogspot.com/2017/11/reaver-titan-wip-18-compare-reaver-dot.html
https://weemen.blogspot.com/2017/11/legio-crucius-reaver-titan-wip-19-more.html
https://weemen.blogspot.com/2017/12/legio-crucius-reaver-titan-wip-20-lasers.html
https://weemen.blogspot.com/2018/02/reaver-titan-wip-19-weapons-up.html
https://weemen.blogspot.com/2018/04/reaver-titan-wip-update-22-legs.html
https://weemen.blogspot.com/2018/04/reaver-titan-wip-23-weapons.html
https://weemen.blogspot.com/2018/04/reaver-titan-wip-24-its-alive-promised.html
https://weemen.blogspot.com/2018/09/reaver-titan-transfer-wip.html

29 Mar 2018

Imperial Knights - Armiger Warglaive - WIP

Hi one and All,

Thanks for stopping by!

The moment Forgebane was up for pre-order I knew I had to order copies, and lucky for me my box of goodies arrived on Saturday morning! straight into action I built one of the knights to see how I could get LED's in like all my previous knights. Currently my knight order numbers 11 built, with another few to be built including the other Armiger knights. I am planning on doing a post showing them once all are finished with transfers.
The kit was really easy to build, and straightforward. I have, like my other plastic knights added a little plastic between the legs and torso to allow the torso to rotate. I've also not glued the arms into a fixed position.

The tricky part was getting the light fixtures in- this is the smallest cavity to work in with all the knights. I've used 2 1mm red LED's, fixed in with a wire connector which I've cut into 2 pieces. this connects to a single CR2032 battery holder with a switch. 1mm holes were drilled into the head sections, then into the body of the knight to allow access for the wires. Then the lights were positioned and taped into the head with strong tape, and then the head glued together.
The model is painted like my other knights, with metallic red over a silver skeleton - with yellow added to the front shoulder pauldrons. Here I will add knight markings. For my knight force, Red denotes a 'knight', green armour for a Baron, and then a different colour for the Lord.
Overall I'm happy with the look of the knight, and he looks perfectly at home with a selection of the knights I have so far!

Thanks for looking! LH

12 Jan 2018

Imperial Knights - Questoris Knights WIP - LED update

Hi one and All,

I've recently decided to change the LED's I've added to my Imperial Knights. Previously I opted for a simple system with the LEDs running into the torso of the Knight, and adding a coin/tablet battery between the two poles to connect the circuit.
However this was found to be quite temperamental, and often the lights would go out mid game during moving. So, the decision was made to redo the lights within a solid circuit, and a battery pack with a switch to make it so much easier!
I've connected the two LED's into a wire connector, and then connected that to the battery pack. This uses 2 Batteries, and the results are so much better - the lights are brighter, and there is a nice 'behind' glow from behind the head which I like.
Below is the finished result, the glow is definitely 'bright' which is what I wanted, this is helped with the plastic deflector I've added between the LED and the helm.
Next will be to do this to all my knights... (7 Imperial Knights, and 5 Forgeworld) and then to add decals and weathering. I am also looking to add further banners to each knight with honours etc.

I am also looking to try something similar with the Reaver, that is still a WIP..

Thanks for looking! Cheers, Lord Halfpenny
Blog Widget by LinkWithin