22 Feb 2021

Legio Astorum Warhound Titan "Canis Victrix" - WIP #3 - Legs

Hello Titanseers, welcome to another update on where I am at with this second-hand 'Hound, now Walks for Legio Astorum and has legs to do so! I pretty much repainted the legs entirely, with exception of the metallic silver structure basecoat - so all the toes, ball joints, pistons and armour.
The detailing on the Warhound toes is exquisite, four skulls and an Aquila on each toe, plus pistons to grime and shine (the cylinders shiny whilst the build up of grime at the end). Each ankle piston has an Aquila too and a skull and an Opus Mechanicus. I repainted the toe armour and trim and the foot base a dirty Leadbelcher. You can see I cleaned off and filed the armour mounting strip too, this had a lot of old superglue attached.
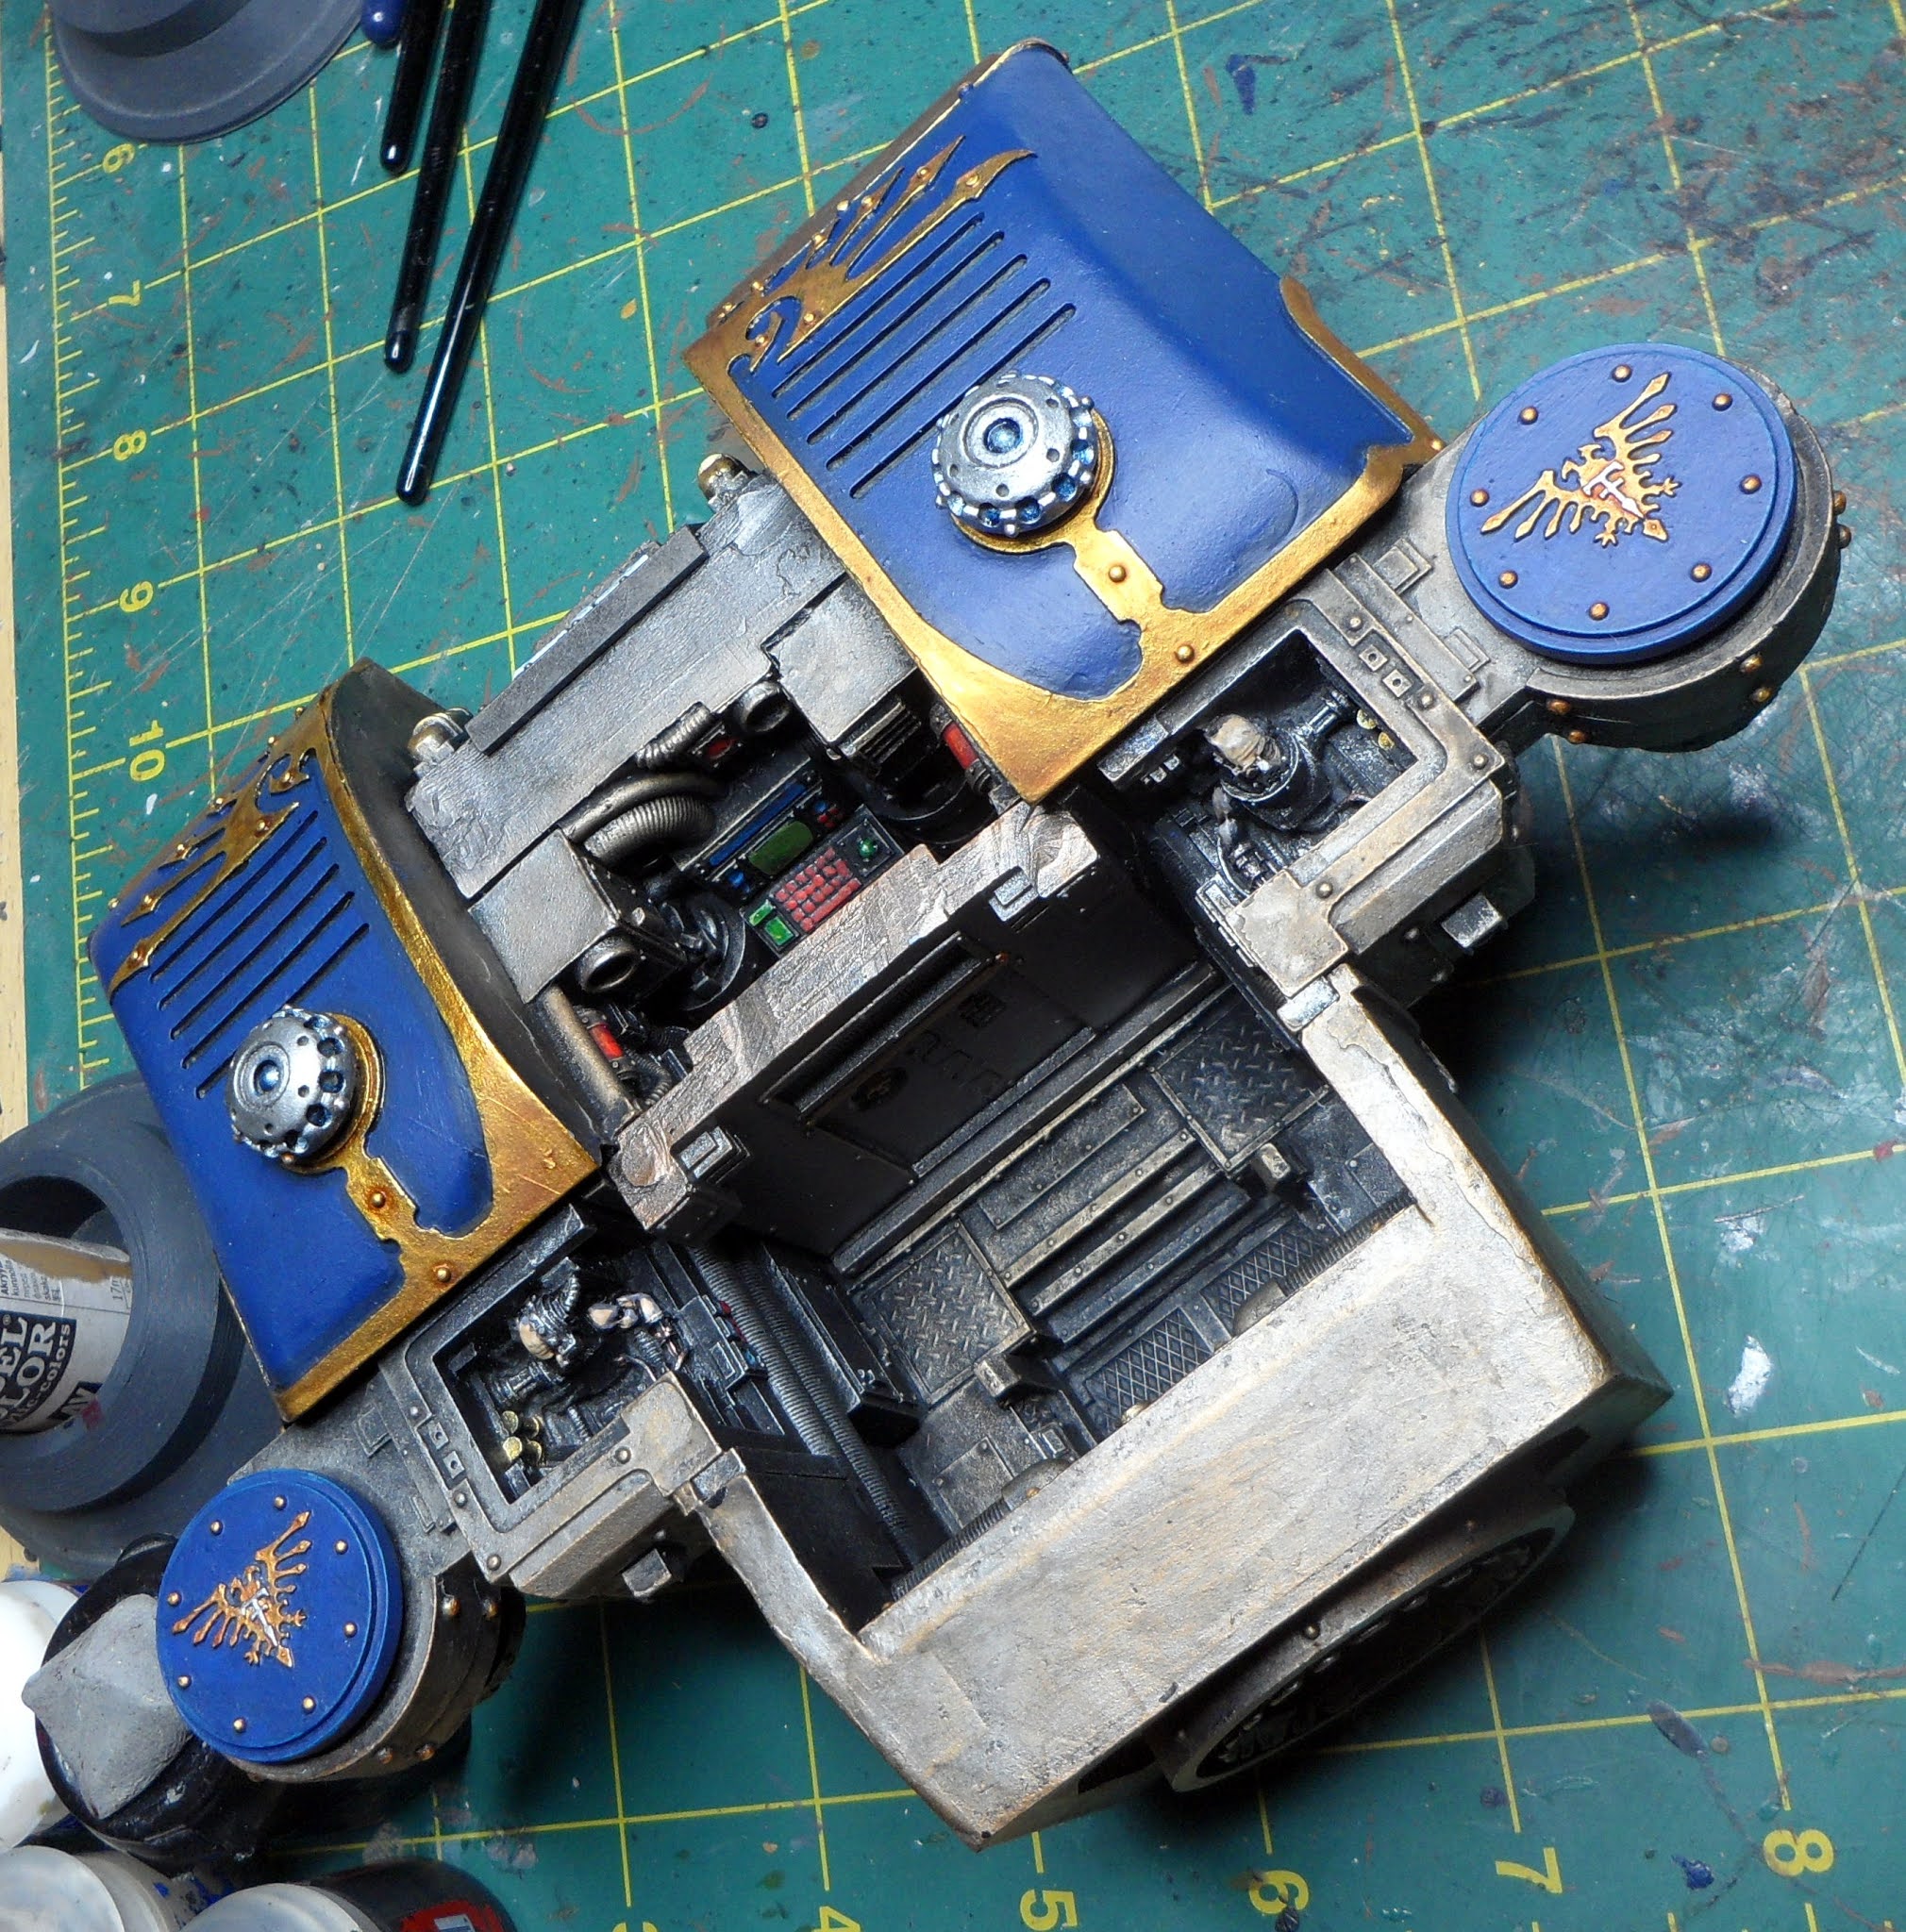
The thigh armour was removed for painting, and firmly glued back once the thigh was stripped of paint on the hidden facing and cross-hatched for better adhesion, these plates unless firmly glued tend to pop off when picking up and manoeuvring the Titan, one has a slight pin extending out of the surface instead of flush, so I drilled a cavity on the corresponding underside of the armour to allow a flush fitting around it. Groin armour was repainted and hip pistons given the same treatment.
I used Stormhost Silver for a bright clean ball joint and raised the rear toes so the weight of the Titan was on the toes, not the flat foot - these are nimble machines, the toes were snapped off, filed and re-pinned and glued to change the footing somewhat.
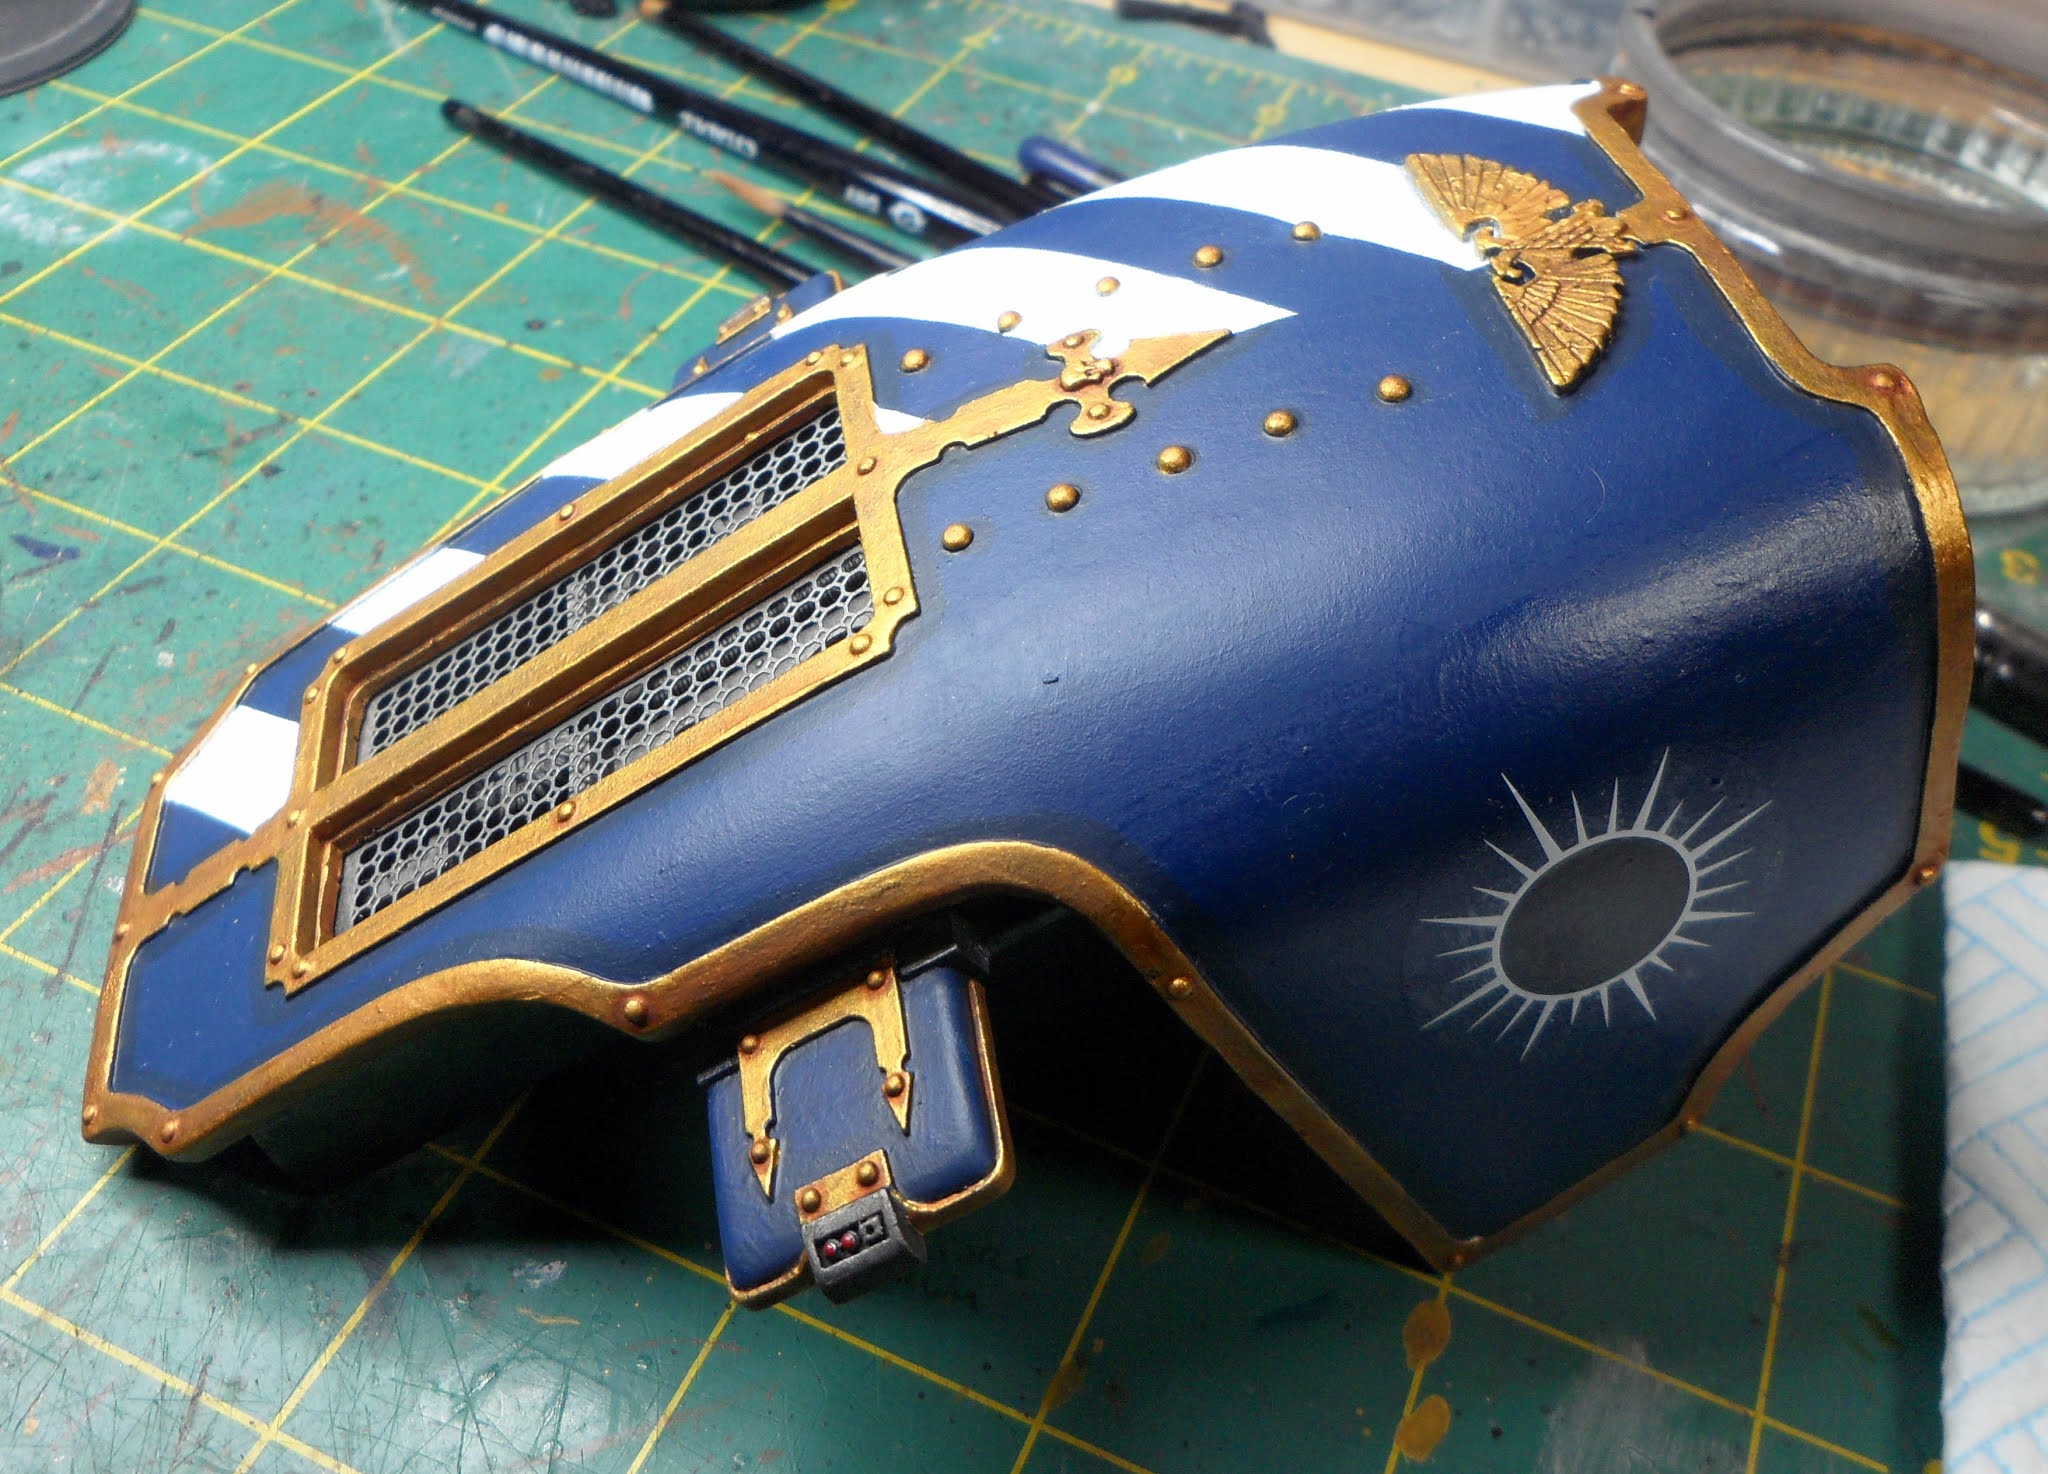
The freshly painted Shins were anointed in Astorum blue and received a Titan Owners Club coat of arms. You can still see the 'Ardcoat sealant over the surface, once the titan is completely lacquered you won't see this difference.
And the finished article, legs reconstructed and repainted. the outermost toes and inner left leg toe are slightly raised from the original base standing in craters, so I will use some slate chips to insert under the raised toes for a firm weight distribution and look.
Here you can see the raised outer toe, ripe for a stone, no rocky ground can slow a Warhound! The actual weight will be carried on the three toes and rear toes plus a black screw from the underside of the base up into the foot - meaning the fragile toes are just stability really, the screw from the base will take the majority of the downward force.
And finally, a close up of the shin with the name scrollwork, Canis Victrix will Walk! Check back next week, nearly done with this 'Hound.

Cheers, Siph.
 

15 Feb 2021

Relictors Primaris Marines - Phobos Librarian

 
Hello All, thanks for dropping in to see my latest addition to the ever expanding Relictors Space Marine Battle Company. Not all my own work, saw this as a bargain on eBay and thought I could adapt it with a little work to become a Relictor Phobos Librarian.
I repainted the backpack and the shoulder Pauldrons, did the base and the leather belts and holster. Plus the gold work and contrast painted over the Force Sword to give my characteristic purple Force Weapon colour.
Tidied up the scrolls and the keys, so basically kept the cloak and the under armour so 90% of mini is as I bought, I just re-did all the detailing to suit me.
I cut away a decal to fit the shoulder Pauldron, showing my Relictors Chapter badge.
The psychic blue OSL was there already, the main thing which attracted me to the purchase - and an hours work I was done with a new addition to the force. My fledgling Primaris reinforcements continue to grow...

Cheers, Siph.

8 Feb 2021

Terrain and Scenery - Simple Cheap Scatter Terrain - Pipeline

Hello All, thanks for dropping by, sometimes the simplest and cheapest ideas can make decent terrain and enhance the battlefield. In the past I have made cake tray Power Turbines, noodle pot Generators, CD stack Fuel Storage Tanks and pencil pot Watchtowers and dice box Ammunition Crates - but today is cardboard tube pipelines.
The paintjob took 3mins... and drying time. Spray black, spray leadbelcher, drybrush rust and brass and mud - done.
The five tubes came as packaging around some handles, more sturdy than loo roll but the tube inside aluminium foil or cling film/plastic wrap should do if cut to size.
Using PVA/Elmers Glue along the lengths in pairs at first then stacked and glued. Simple stack of pipes for scatter terrain and well needed cover for infantry and smaller vehicles.
Done - cheapest and quickest ever... looks passable too!

Cheers, hopefully it helps someone attempt some terrain, it really does enhance the enjoyment of the game. Find my other Terrain ideas at the links above or using the sidebar Label: TERRAIN.

Siph (5pts)

1 Feb 2021

Legio Astorum Warhound Titan "Canis Victrix" - WIP #2 - Main Torso

Hello Titanseers, thanks for dropping by. I have continued to work on the second hand Warhound Titan, my "Canis Victrix". I finished the torso, repainted the armour and trim and finished detailing the insides. Above you can see the 10mm rod magnets in the arms, the arms are glued and pinned in place. I was rather pleased with my neat chevrons on the elevator/entry hatch.

You can also see the magnet in the waist socket firmly glued in, I decided not to replace this one, the socket and existing magnet provide enough force and friction to hold the torso firmly on the waist without movement.
Inside the internal bulkhead to the reactor compartment was fitted and the details finished off. The original owner had made a start but the details like purity seals, gold work, screens etc needed doing.
Here is a closer pict capture before the internal bulkhead was fitted. The missing array of vents /exhausts on the rear of the carapace in-between the Armour panels was replaced with an armoured sheet from an IG vehicle and two 'exhausts' from the Cities of Death buildings frames.
The armour trim was given two coats of Vallejo Brass and the stripes tidied up where the paint had bled on the tape edges.
The Armour Trim was washed with Reikland Fleshshade and Astorum decal applied, and gloss coated for protection - this will get a further lacquer coat later so the decal edges won't be so visible.
The completed Torso
Proudly displaying the Certificate of Authenticity number No.3615
And lastly where I have got up to, the main bulk of the titan is completed, but I still have the Head Unit, Inferno Cannon, Legs and Base to do, so about halfway for sure.

Thanks for dropping in to check my progress, cheers, Siph.
Blog Widget by LinkWithin