31 Mar 2023

Deathwatch Veterans - DONE

Hello one and all,

Another week, another 10 man addition to the Deathwatch force - this time 10 Veterans to the force. 

These, games terms are two, 5 man squads, 1 with 4 heavy bolter/flamer combi weapons, the other with 4 Frag cannons. These are painted in the same style as the other marines in the army with a metalic black base. I've free handed a couple of the shoulder pauldrons that were not moulded. The plan for these could be to have both units in a single drop pod to arrive mid battle in the opposition force to destroy objective claiming units or HQ's. 


Happy with these LH (10pts)

27 Mar 2023

Adeptus Mechanicus - Secutarii Peltasts - Squad #1

Hello Readers, thanks for dropping by. I have the first of a few instalments of a commission I got a company to do for me whilst I was away. Time is a precious resource and I have too much time away with work, and too many projects on the go when home so these languished in the to-do pile for a long time - so I shipped them out to get done. The standard was mid-tier tabletop standard and the product looks great, the communication and time delays getting done means I won't recommend them, despite the discount and free Tyrant Mini Case. It was meant to be 11-15weeks, it took April22 to Feb23... I won't discourage anyone by naming them as they had issues with there freelance painter meaning long delays and poor communication but eventually they came through and service improved - hopefully it was isolated issues and not reflective of their general service. Anyway...
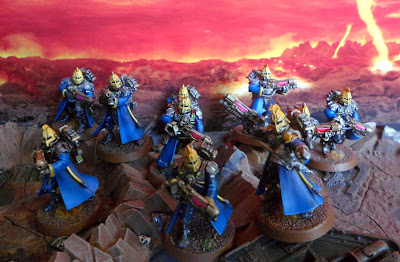
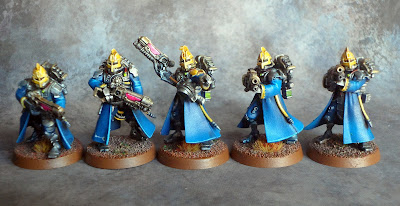
I have had these Titan Guard painted in the scheme of Legio Astorum, blues and yellow helms to mimic the God-Engines they protect.

GW says the were developed in the lost and ancient days long before the birth of the Imperium, the Secutarii Titan Guard were created as the honour guard and protectors of the Titan Legions. Sheltered by personal harmonic Kyropatris Field Generator (5++), it is their sacred duty to eliminate saboteurs who would approach the God-Machines by stealth and hunt down those that flee the Titans' wrath.

Charged with guarding the Legio Titanicus against foes of flesh and bone, the Secutarii Peltasts use their flexible galvanic casters to engage all manner of enemies. This electro-galvanically driven, multi-function projectile launcher has a variety of firing modes, each suited to a different target. 
Peltasts may ward off lightly-armoured hordes with a barrage of razor-edged Flechette Burster (Rapid Fire2, 24in St3, Dmg1, AP0); burn concealed infiltrators out of cover with retina-searing Ignis Charges (Assault D3, 18in, St3 Dmg1, AP0 but don't need LoS); or pick off elite combatants with supersonic armour-piercing Kinetic Hammershot (Heavy1, St4, 30in, Dmg1, AP-2). They can also once per game  confuse and disorient heavily-armed combatants with a canister of blinding chaff meaning instead of shooting they can be -1 to Hit for ranged weapons - ideal when manoeuvring into a firing position.
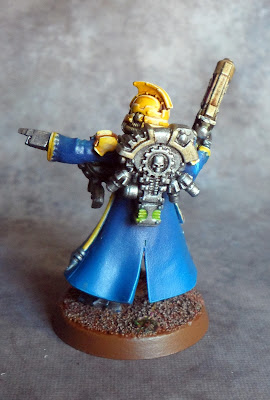
The Secutarii Peltast Alpha is denoted by his more ornate helmet crest and yellow and gold pauldrons. His Kyropatris Field Generator can be seen on his back. I had an Omnispex added to the squad to negate the benefits of cover for the enemy.
Cheap troops, Titan Guard units can be attached to Battle Forged Adeptus Mechanicus forces without affecting their Forge World Dogma, but these Secutarii don't benefit from the Dogma.

I have a few Peltast Squads to finish off, just adding my flock mix in patches to the base to match all my armies and re-doing the base rims with my standard Calthan Brown as Mournfang Brown is slightly darker.

Cheers, Siph.


20 Mar 2023

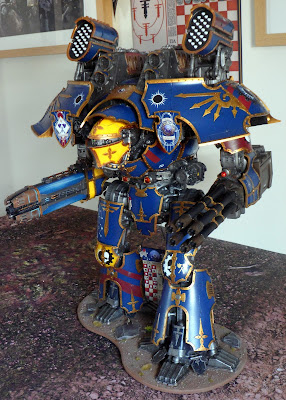
Legio Astorum Warlord Titan #3 - No.10 - Ex Noctia, COMPLETED

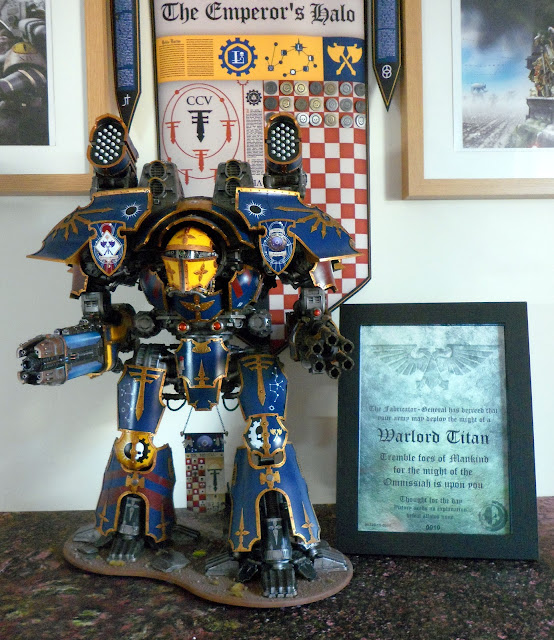
Hello Titanseers, thanks for dropping by! My Titan journey has reached another milestone, the ex-Atarus Warlord No.10 - Ex Noctia (From the Night) has now completed the Rites of Colour and has been re-sanctified for service in Legio Astorum and has been attached to the Emperor's Halo Maniple!
Unlike my previous Warlord (104 - Dominus Victoria) this one has the original Alpha head. I have armed it here with the newest in my arsenal, a Macro Gatling Blaster and the previously seen Sunfury Plasma Annihilator. I still have two Arioch Titan Fists with Vulcan Mega Bolter Arrays to paint as well as procure another ranged weapon, as the Macro Gatling will eventually go to Warlord #3, a "DakkaLord"... 
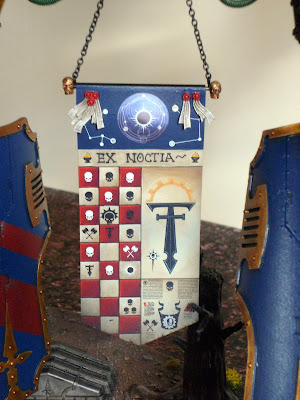
Here is the re-branded Titan Banner, adopted from the previous owner, and Astorum-ised...
The red heraldry of Atarus has been preserved to honour the Titan Machine Spirit as well as the previous paint job.
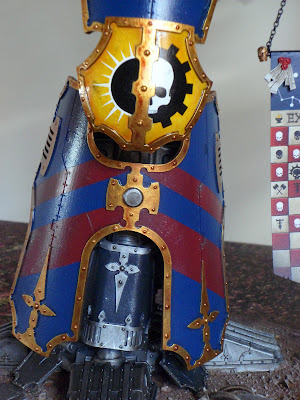
As Dominus Victoria has, the Certificate Number is proudly displayed on the torso armour. And rather than the Maniple white stripes, I have preserved red ones.
The Warlord Heraldry also has a nod to the past, preserving a red stripe underneath the Warlord icon.
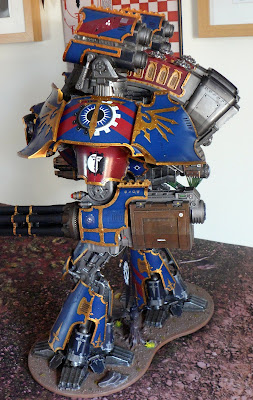
From this view you can see the preserved Atarus red scheme, the Void Shield vanes, onto the Apocalypse Missile Launchers, onto the shoulder armour and down onto the upper arm armour. Not too much to detract from Astorum, but enough to quell the Machine Spirit and mark the victory at Beta Garmon.
The rear, defended by 2x2 Lascannon Arrays!
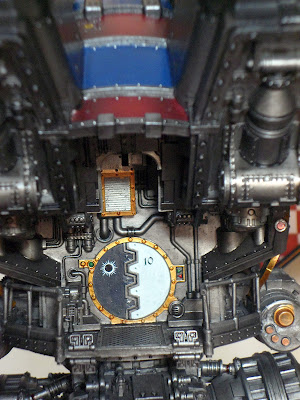
Here you can see the red and blue patterns to link the past and present livery, and the Titan Certificate number repeated on the crew access hatch.
Sporting the newest Macro Gatling Blaster weaponry!
Ex Noctia Walks for Astorum!
Legio Astorum Walks!

If you fancy making your own Warlord Titan from Forge World, I have a handy Construction Guide here: 

The link to the whole Titan Construction process can be found HERE.

Legio Astorum will Walk at the next Titan Owners Club UK event, where they will be battling alongside other Forge World Titans! Remember to register your own Titans at Titan Owners Club, and if you want some cool Titan Owners Club merchandise, we even now have a Spreadshirt Shop, any profits go to running these events or buying Titan sized terrain for future Walks for all members to enjoy :)


Cheers, Princeps Siph :) (75pts)

17 Mar 2023

What to do with the Desolator Marines??? Help!

 Hello all!

A weird post this week.. I was planning to post WIP pics of my 10 man Desolator marines, included in the Agustus box set.. and well.. they haven't. I can't figure out what to do with them.. I'm in the camp of 'they look silly, but rules wise needed' thus have looked at ways to make them better. 

I do like the option of mounting the rocket launchers to the backpack, however the rules wise this would be inaccurate, as these are the weapons the marine has to 'point and fire' whereas teh fed rocket cannon is the one that can target unseen models - however the ammo feed would need to be removed as not required.. 

Another option could be to reduce the 'nerf gun' sized weapons, and make them more streamlined, however this still leaves them looking like they are shooting t-shirt cannons into the crowd.. 

 Could there be an option to utilise the old missile arm of firstborns, with the missile pack from the aggressors on their back? which then leads to the question of if there are other kits that could be used to make them look 'better' (I quite like them as they are - Siph)

I am doin these initally for my Deathwatch, so there is the option I go full out for converting them, and then when it comes to my Ultramarines, I stick with the original- as Guilliman wouldn't allow them to diviate from Cawl's work too much..

So the question is what to do with them??? LH

13 Mar 2023

Forge World Macro Gatling Blaster for Warlord Titan - How to Build

Hello Titanseers, and welcome to the Part 2 of the How to Build a Forge World Macro Gatling Blaster! Part one was an unboxing really, seen HERE back in Sep 2021, but like all good things, they eventually come around and here I have finished it. The FW instructions are good, follow them.
As per the really good instructions that FW include, I started with the Ammo hopper, but also the top piece at this time. The Ammo needed a little green stuff filling on the underside but relatively easy otherwise. I always clamp my builds as the JB Plastic Weld takes 5mins to set, 1hr to cure. Don't forget to roughen up the surfaces where the two pieces join for a better adhesion. Do three parts here unlike the FW instructions, the top piece needs to be done at the same time as the sides.
I attach my weapons using 8mm x 30mm rod magnets, with a 12.5KG pull, so these sit fine on the Titan without fear of dropping. And can be easily rotated to break the pull for ease of removal. Here you can see the rod magnet in the attachment part.
At the Barrel end, I attached a small brass pin and roughened the surfaces for the join.
And at the rear of the mechanical assembly where the Ammo Hopper sits, I prepared the surfaces for JB Weld.
As per the FW instructions, it is easy to fit the barrel struts to one barrel and using the breach block as a template, attach the other barrels - only three to allow all round painting, the other three can be glued once painted. I used superglue for these small attachment points. The reverse of the Breach Block has also been prepared for JB Weld. A point to note, be careful when scoring the Breach Block reverse, not all of it is hidden, the edges of the barrels and the edges of the rotating gear leave some of the scored surfaces visible - so when scoring, don't go right to the edge like I did on the barrel side, doh! 
The Ammo Hopper and Gun Assembly were prepared for JB Weld.
Using clamps, the Ammo was fitted to the Mechanical Assembly
Here is the nice gun unit now ready for painting
The Armour Plates fit in these two indentations, they were roughened for JB Weld joining too. Note - paint the main assembly before you attach the Armour Plates, otherwise you will not be able to get to this shells in the feedbelt!
Once the Barrel Assembly was painted, I glued the remaining barrels to the support struts before gluing to the round Breach Block assembly. Now it was a simple bring the barrel assembly to the main gun assembly and JB Weld - I used long clamps to achieve a tight join - the flat surface and the brass pin will need to support the barrel length.
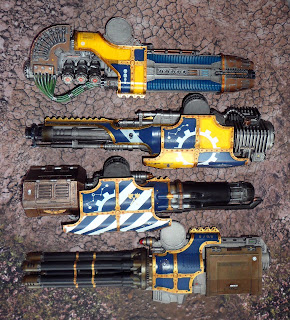
And here is the final result, all painted in Legio Astorum colours, the barrels look great in black against the gold of the support struts. I particularly like the Scale75 Decayed Metal finish, washed with 4:1 Agrax/Terradon Turquoise and edge drybrushed Balthasar Gold. I repeated the decayed metal on the ammo hopper and now the 'working parts' look the business!
I have another of these for the eventual 'DakkaLord' Warlord Titan
I painted the Ammo box like its a cheap throw away container held on the rails, small decals to show the moving parts.
And here it is next to the other Warlord Titan weapons I have painted so far. Great Guns indeed!

A useful link to the Warlord Titan Construction process can be found HERE.

Cheers, Princeps Siph

10 Mar 2023

Deathwatch Update

 Hello All,

This weeks offering are further additions to my growing Deathwatch force.

I am current working on 10 space marine Vets, armed with heavy weapons- the frag cannon, and the heavy bolter/flamer combi weapon. These are 2 seperate squads, however the plan 'could' be to utilise these as a 10 man squad into a drop pod for some hard hitting force in the opposition deployment zone. 


These are done as per my other units, with the details picked out. 

Happy with how these are progressing. LH

6 Mar 2023

Relictors Space Marine Chapter - MK1b Rhino APC for 4th Company

 
I cannot resist a decent eBay find, this was a plain Rhino in blue, decent enough but thin coats of paint which made the purchase appealing...  My 4th Company RTB01 Marines have two full squads, but only a single Rhino, so now they both have a ride in style. The above reminds me of the 90's box art style!
I added the Chaos chains to 'Relictor' it a little. Base coat was Uniform Grey from Army Painter, over brushed Codex Grey (Dawnstone) and washed Nuln Oil, drybrushed Administratum Grey.
I picked out some stowage, an ammo crate and a camouflage sheet for the empty track rear sections. This one unfortunately didn't have the fragile hand rails like the first. (EDIT - I managed to pick some up on eBay from a very nice bitz seller, theblisteredheel).
I manufactured some hatch handles from some spare radar antenna bits from the vehicle frame, cut and shaped as necessary to form new handles.
Here is Squad IV with their new/old ride.
And a shot of the Rogue Trader motorpool as it stands, all attached to 4th Company, as quite frankly 5th Company is huge already!

EDIT - The bitz I wanted came through and I have managed to purchase the delicate handrails and a missing hatch underneath!

Cheers, Siph (5pts)
Blog Widget by LinkWithin