22 Jan 2016

Relictors Spacemarine Shadow Captain Solaq

Hello Kind Readers, all is not forgotten with regard to my Relictors. Amongst the titan build I haven't forgot the actual Weemen... Here is my latest offering towards the Battle Company, another Captain but a nice one. This Captain is found in the Shadow Force Solaq boxset from the Damocles Warzone set of two, the other being the Tau.
I substituted the Plasma Pistol out for a Storm Shield to make him more survivable and hopefully either with a Power Sword or Relic Blade plus his Bolt Pistol, he can make a good fight of it.
The Storm Shield was a third party creation bought a long time ago and waiting for the right miniature to be used, I thought it would look good on this particular Captain as he has wing/feather-like icons all over. I am rather pleased of my brushwork this time, I am showing improvement with age, lol. The feathers, gold and cloak are all quite good I reckon.
There you have it. Right back to the Titan build in earnest... but a nice small scale break from the massive build. I really enjoyed this little diversion.

Thanks for dropping in. Siph.

20 Jan 2016

Adeptus Mechanicus Skitarii Sicarian Ruststalkers

Hello Readers, more completed models from the back catalogue of purchases, these are from the Blogger Buddy Bulk Buy I made from my blogger buddy Mordian7th. Adding to the Onager Dunecrawler and the Cult Mechanicus models I already have.
This is all Mordian7th's work, I just re-did the bases to match my own models. I like the gloss black look of the Ruststalkers heads best.
Well, a quick post of my updates, still working on the Warlord, update post on that soon. Thanks for dropping in. Siph.

18 Jan 2016

Legio Astorum - Warlord Titan Build - WIP #11 - Pinning Shoulder and Arms

Welcome Titan Enginseers, thanks for dropping in. Another quick post about the Warlord. This time, just a quick update and an important one. This is how I will ensure the arms are fully supported. I already spoke about the triangle arrangement FW designed into the titan for the Shoulders, so the arms won't droop, but here I am backing it up with a pin right through linking four major components so the arms are as strong as can be.
Here is the drilled hole, using the entire 11cm drill length of my 2.5mm long drill bit I can get the pin to link through the Shoulder Mounting Assembly, through the actual Shoulder, into the Upper Arm Joint and into the Upper Arm itself - I am pretty sure the JB Weld will hold but this can only help.

You can also see the fitted Arm Pistons mentioned in the last post, all dried and reinforcing the arms further.
And all to show is a small hole in the Shoulder Mount Assembly which will be green stuffed and filed smooth. All that is left for the Torso now is the fitting of the Carapace 'lid' and the venting and void shields. Waiting for magnets to arrive first so I can think about mounting the head and neck joint with magnets, either a straight drill through or like the Waist, a small cavity job? I'll wait to see how strong they are and go from there.

Cheers for dropping by. Siph.

A useful link to the Warlord Titan Construction process can be found HERE.

15 Jan 2016

Legio Astorum - Warlord Titan Build - WIP #10 - Arms

Welcome Back Readers, Thanks for dropping in for the next installment of the titan build. Here I start the arms, I have already glued and dried the Upper Arm Pistons to the Upper Arm. Next, the Elbows are glued and clamped to the Upper Arm assemblies.
Once dry, the next day I can Arm assemblies into the Shoulder Joints, after roughing up the surface to maximise the surface area for the JB Weld to affix to. There will be a lot of weight pulling this join apart with the weight of the Titan Arm Weapons below it.
To assist the glue, I clamped the sides onto the Upper Arm so I have now three surfaces of glue affixing the arm into the socket.
The alignment of the arm and Shoulder Joints should be either 90 degrees or more so the arms hang down vertically or out at the sides a little, here is the 90 degree one. I then drilled the pin holes for making the arms supper strong.
Here is a shot of the pin going in place, through the Shoulder Joint and into the Upper Arm. The whole Arm will be further pinned from a pin reaching through the entire assembly from the Shoulder Mounts, through the Shoulders themselves and in through the Shoulder Joints and into the Upper Arms. I am planning on magnetizing the weapons in place using a magnet up in the lower arm coupling and in the top cog of each weapon - yet to purchase the Arm Weapons.
The arm assemblies were then glued and clamped into the Shoulder and at a slight angle, so the weapons would point out at the front of the titan roughly ten degrees from straight forward - test pose this desired angle before gluing and clamping in place. Once dry, you can go ahead and glue the two sets of Shoulder Pistons.

Cheers, Siph.

A useful link to the Warlord Titan Construction process can be found HERE.

13 Jan 2016

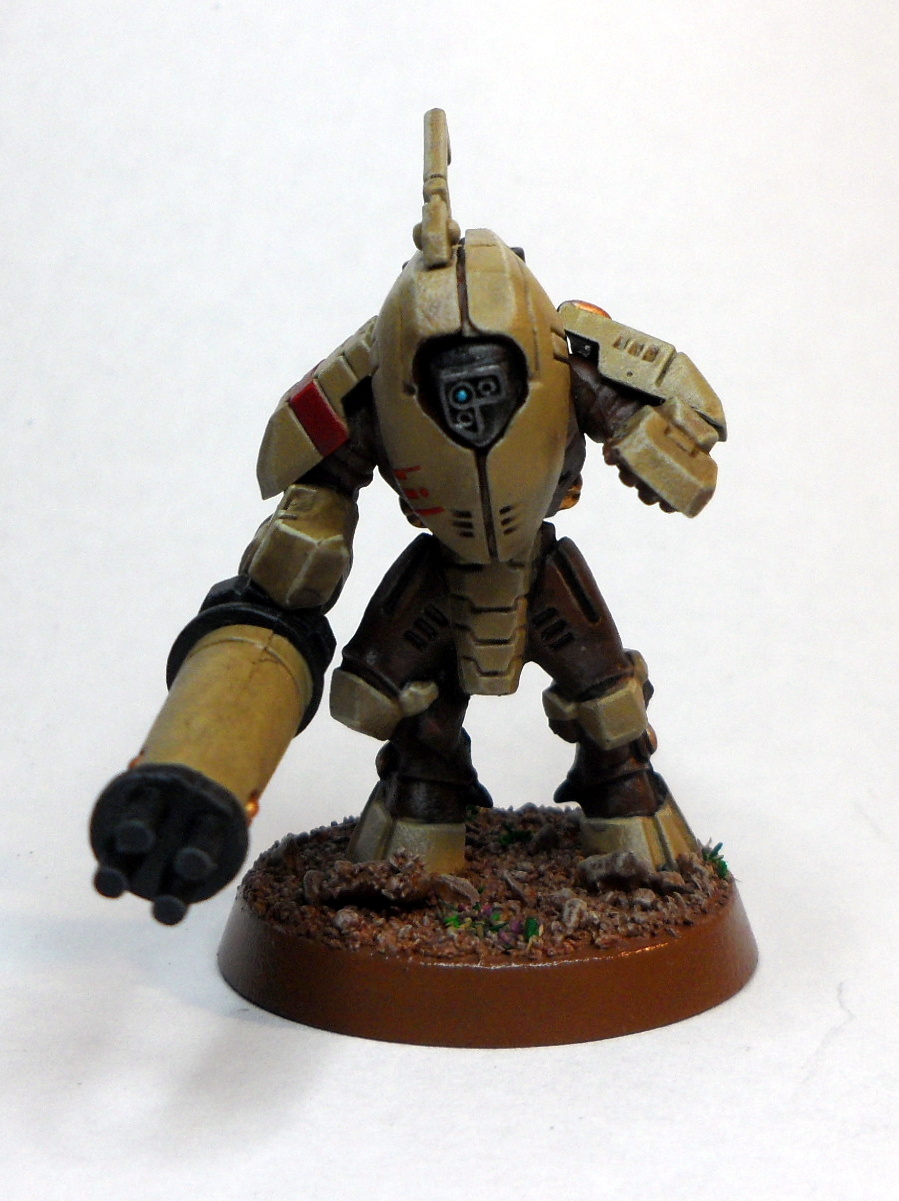
New Year, New Army - Vior'la Sept Tau


As GW was selling some great value New Army bundles, I bought a Tau one along with several other kits and the Damocles Infiltration Cadre. The scheme being tested here was meant to be the Stealth Suit version of more camouflage version of the Vior'la Sept White and Red, however, I liked the Zandri Dust colour so much, I will do the whole lot in this colour. A few units may receive the White and Red however the Codex states that the red markings are Vior'la, the armour plate may be coloured wherever the Sept is fighting, green in jungle worlds, grey in Urban zones, so the Bone/Brown colours suit my terrain and colour of the earth - Calthan Brown (Mournfang Brown).

I chose to do the 'metallics' black and grey as a departure from my normal SM Leadblecher, setting these Tau apart from human technology and copied the gold gyros from the GW normal to add spot colour to an otherwise 'drab' colour palette. The touch of red Vior'la Sept marking lifts the scheme too. Blue energy also emanates from lenses and energy couplings/vents etc.

The fatigues can be base coated with Mournfang Brown spray and the vehicles Zandri Dust to match the armour, now GW has decided to produce spray Zandri Dust once again. I was going to do the 'back pack' Zandri dust, but as these are stealth teams, they will remain brown. The base is finished as my previous bases, Calthan Brown, Kommando Khaki/Ushabti Bone drybrush, linking in the camouflage scheme to the environment nicely as I have used both those colours as line highlights.

Thanks for dropping in, cheers, Siph.

11 Jan 2016

Forge World Greater Brass Scorpion of Khorne

Hi All,
I've recently had the pleasure of painting and building a Greater Brass Scorpion of Khorne. I've got to say this was one of my favourite kits to plan, build and paint. I had always really liked the FW, heavy metal team's Brass Scorpion, loving the paint scheme. I know I'm nowhere near that standard, however I wanted to test myself. The other major point is that I do not currently own a spray gun- thus I wanted to see what I could do without one!
The Scorpion was washed and prepared as per normal FW kits. I then checked to make sure all the parts fitted correctly as well as making sure all parts were present!

I am one of those builders that prefers to build the entire kit, or to utilise sub assemblies. However the Brass Scorpion is probably best done as independent units. The only portion I initially built the body, however all armour plates and legs/arms were left to be completed separately.

Using Black spray to undercoat all parts, I then sprayed the parts with a combination of brass and silver from spray cans. The Brass covered the entire model, and the silver done to not completely cover the Brass underneath.

I then did something I don't normally do - I would have normally dived in and started painting armour panels and legs all in one go. Instead, I painted up a single leg piece to see, a) whether I could achieve the scheme I wanted, b) How the scheme would actually look. I made a list of the colours used to make sure I could repeat the process.
The scheme was them applied to all the other armour plates and legs/body etc. The scheme was:
  • Base Chaos Black spray
  • Brass then Silver model spray
  •  Mephiston Red lines within the armour plate showing Silver 'circles' from the undercoat
  • 2 coats of Carroburg Crimson Wash
  • Wash of Bloodletter Red Glaze
  • Evil Sunz Red within the Silver circles, showing some of the Silver as edges to the Evil Sunz
  • A wash of Agrax Earthshade
  • Wild Rider Red stippled within the Evil Sunz red circles
  • Wash of Agrax
  • Final wash of 'ardcoat
For the Brass edging i used a simpler pallet of colours:
  • Brass Scorpion 
  • Nuln Oil Wash
  • Highlighted with Leadbleacher
The cabling section was a double wash of Nuln Oil over the Silver/Brass basecoat. All weapons were picked out with black, then highlighted with a light dry brush of Leadbleacher. The bodies within the cabling were picked out in Codex Grey, then washed with Nuln Oil, then grey highlighted, and then a final wash of Tharaka Green - to give them a deathly pale complexion. The model had its claws covered with Blood for the Blood God Technical Paint to give it a 'Blood for the Blood God' feel - with freshly spilt blood from its latest victims.
Overall I'm really happy with the final look of the Scorpion, it reflects light differenetly as the light catches the armour plates at differing angles, which was something I was hoping for. I'm glad I took the time to plan this project, and feel that it is reflected in the final look of the model, and photographed in my new Foldio2 light box, cheers Siph ;) I hope you like! Thanks for dropping by.

8 Jan 2016

Terrain and Scenery - Promethium Relay Pipelines

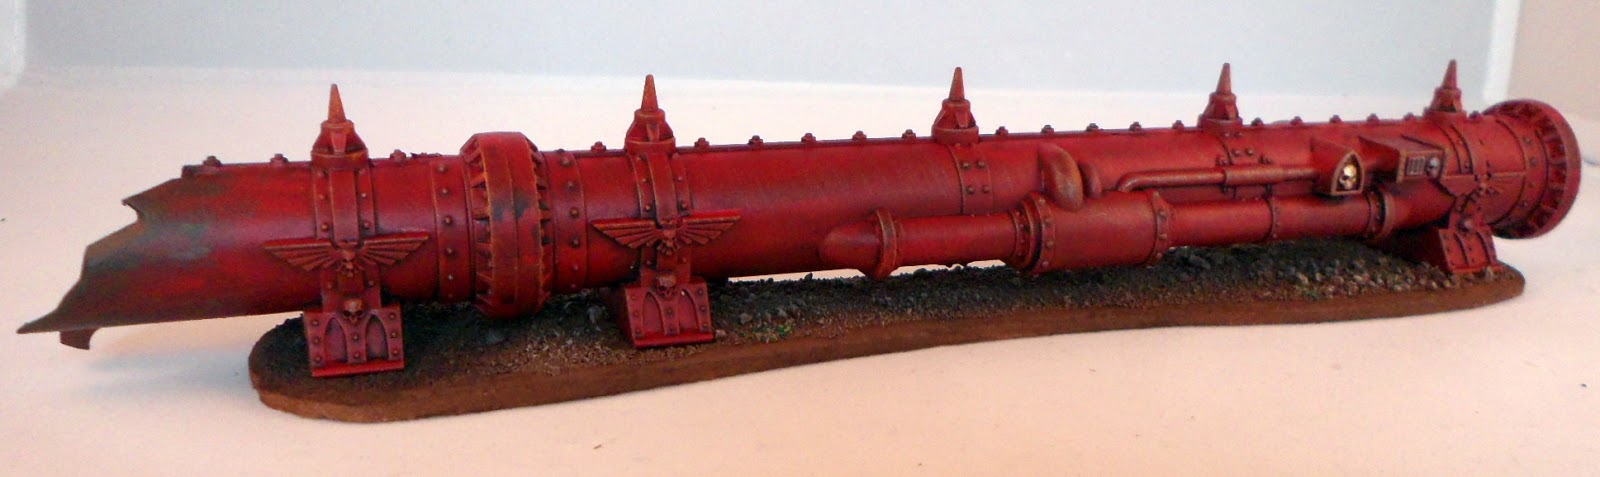
Hello Readers, whilst at Warhammer World in November I picked up a set of these Promethium Relay Pipes to add to my vast Terrain set - never have too much to choose from. I decided that I would construct the pieces (4 Large, 4 Small) in four sets as the rules say you need to field them with at least one other piece anyway. And the scheme followed on from my Fuel Storage Tanks and the objective marker Fuel Dump.
This is the Command piece I guess where you control the flow rates etc. So I made a dump of fuel cans and a tool kit to siphon off the fuel. This rule set allows Flamers to gain Torrent when near the pipes. The paint job was a Red Halfords Primer followed by Tornado Red Halfords car spray, washed with heavy wash of Nuln Oil and drybrushed with Macharius Solar Orange Foundation Paint and then Leadbelcher. Real quick and easy.
I like to base the Terrain I have, but I wanted then to still connect properly so I made the bases smaller than the ends of the pipes to allow overlap.
This is the only single piece I have. But it has a three way choice of where it connects to other pieces.
One broken pipe, actually two pieces, one large and one small. I weathered the ground around the break so show burnt/polluted earth.
Here is the second broken pipe pieces.
All the pieces together.
And a shot with the Fuel Dump and Fuel Storage Tanks.
And if you were wondering, the rules are easily found under the pump controls, thats why I had space for the fuel cans! Points value scored out for copyright reasons but only as much as a Terminator, not bad for 4+ cover save and Torrent Flame Weapons, my Relictors (Salamanders) Vulkan He'Stan approves. Thanks for dropping in.

6 Jan 2016

Legio Astorum - Warlord Titan Build - WIP #9 - Shoulders

Welcome Readers and Titan Builders, here is the latest installment of the titan build. I wanted the shoulders to be extra strong hold and I know a lot of weight will be pulling down on these parts. Needless to say, Forge World have done a great job of having a great design with a small triangle shoulder design where the Shoulder Mounts meet the top side of the Shoulder itself, so thereby making it a strong design to prevent sagging.

I started off the shoulders with roughing up the flat plates with the Dremel, this will maximise the surface area for the super strong JB Weld to glue - btw, now finished off my 3rd tube, so you'll need at least 4 x 25ml tubes for the whole titan!
Once JB Weld was applied, I clamped into place, ensuring I went slowly and one side at a time. I left this 24hrs to harden completely - again, slow and steady.
Once dried, I drilled holes and pinned the shoulder in three places, top into the pipe assemply on top of the shoulder, drilled from inside, and two pins in the bottom. Assemble the second Shoulder and repeat the pinning process.
These pins will be covered when the two arm pistons are in place. Saves having to green stuff over them later! I leave the pins to dry overnight also.
While the Torso and Shoulders dried, I got on with more construction. The Carapace Weapon Mounts were first glued and clamped on the Shoulder Mounts before assembly to the Torso. Not forgetting the clever re-inforcement the shoulder mount gets from the small looped pipe piece underneath, thus giving a neat cruciform join at the Torso Sideplate. 
The completed Shoulder Mounts where glued and clamped to the Torso (Torso Lid again there for strength, not yet glued as I want to pin the interior).
This shows why I have not yet glued the Torso Top Carapace plate on the model yet, I can get into the titan to pin the tops of the Shoulder Mounts for extra strong reinforcement. This pin goes into the Weapon Mount itself.
And finally, a view of the Torso to date, other than fitting the lid, one little job left, and that is to drill down into the Arms when fitted, through the Shoulder and Shoulder Mounts, locking all three together at the exterior edge of the titan, forming the super strong triangle mount I mentioned - clever FW design.

Thanks for reading this far, and next up, Titan progress with the arms themselves. Cheers, Siph.

A useful link to the Warlord Titan Construction process can be found HERE.

4 Jan 2016

Using Betrayal At Calth Miniatures in 40K - Mordaci Blaylock WIP

Hello Readers and Titan Enginseers, I thought I'd have a break from the massive Warlord scale hobby and do some tinkering with the Horus Heresy Betrayal At Calth (BaC) box miniatures, now, I have enough 40K to get on with and paint more Relictors without starting a HH Legion as well but the BaC box does give a great addition to my forces and the game can still be played using Relictors!

Lord Halfpenny suggested that the Captain Aethon in BaC could be used for a character found in Forgeworld's IA9 Badab War Pt1, Captain Mordaci Blaylock - ideal as he is armed with Storm Bolter and Chainfist called Foe Ripper.

I removed the Combi-Melta and added a modern '40k' era Storm Bolter and a Iron Halo and done. Captain Mordaci Blaylock - The BaC Captain is an ideal miniature for this Character of renown, has blinged up Termie Armour and a cloak, his special rules also make all Terminator Squads Scoring Units - in 7th we (weemen) interpret that as Obj Sec as everyone can score these days.
I then set about thinking what to do with the Word Bearer's Chaplain Kurtha Sedd, well a nice addition of a Combi-Grav and Bolt Pistol in place of the Crozius and we have a Sternguard Sergeant, or Captain as I please. I carefully removed the hand holding the long Crozius so the wrist guard is not damaged and the oversized Crozius and gauntlet can be used in another conversion later if needed. I have enough Chaplains at the moment.
The base was from Secret Weapon Miniatures. Suited his close together feet and gives him some 'character' height. Just held together with sticky putty for ease of painting in sub-assemblies.

Thanks for dropping in.

1 Jan 2016

Mechanicum - Thanatar Cavas Siege-Automaton with Hellex Plasma Mortar

Happy New Year fellow Bloggers and Readers, thanks for dropping by. Here is my first offering of the New Year. I am continuing slowly with the Titan build, however I have a few Ad Mech and Mechanicum stuff to finish off too. This beast is a Thanatar Cavas Siege-Automaton armed with the lobbing Hellex Plasma Mortar, large blast ordnance S8 AP2 fun-ness.
This is a cool looking Forge World model, also armed with a twin linked Mauler Bolt Cannon, which is a marine killing AP3.
I love the look of the magazine ammo feed for the Boltcannon as well as that great Plasma Mortar.
And if you get too close, he'll just hopefully squish you with S8 Monsterous Creature CC attacks. 
Here is a shot with the other Mechanicum units I have already completed, these Castellax should keep the enemies at optimum Hellex Plasma Mortar range!

Thanks for dropping in. Happy New Year.
Blog Widget by LinkWithin