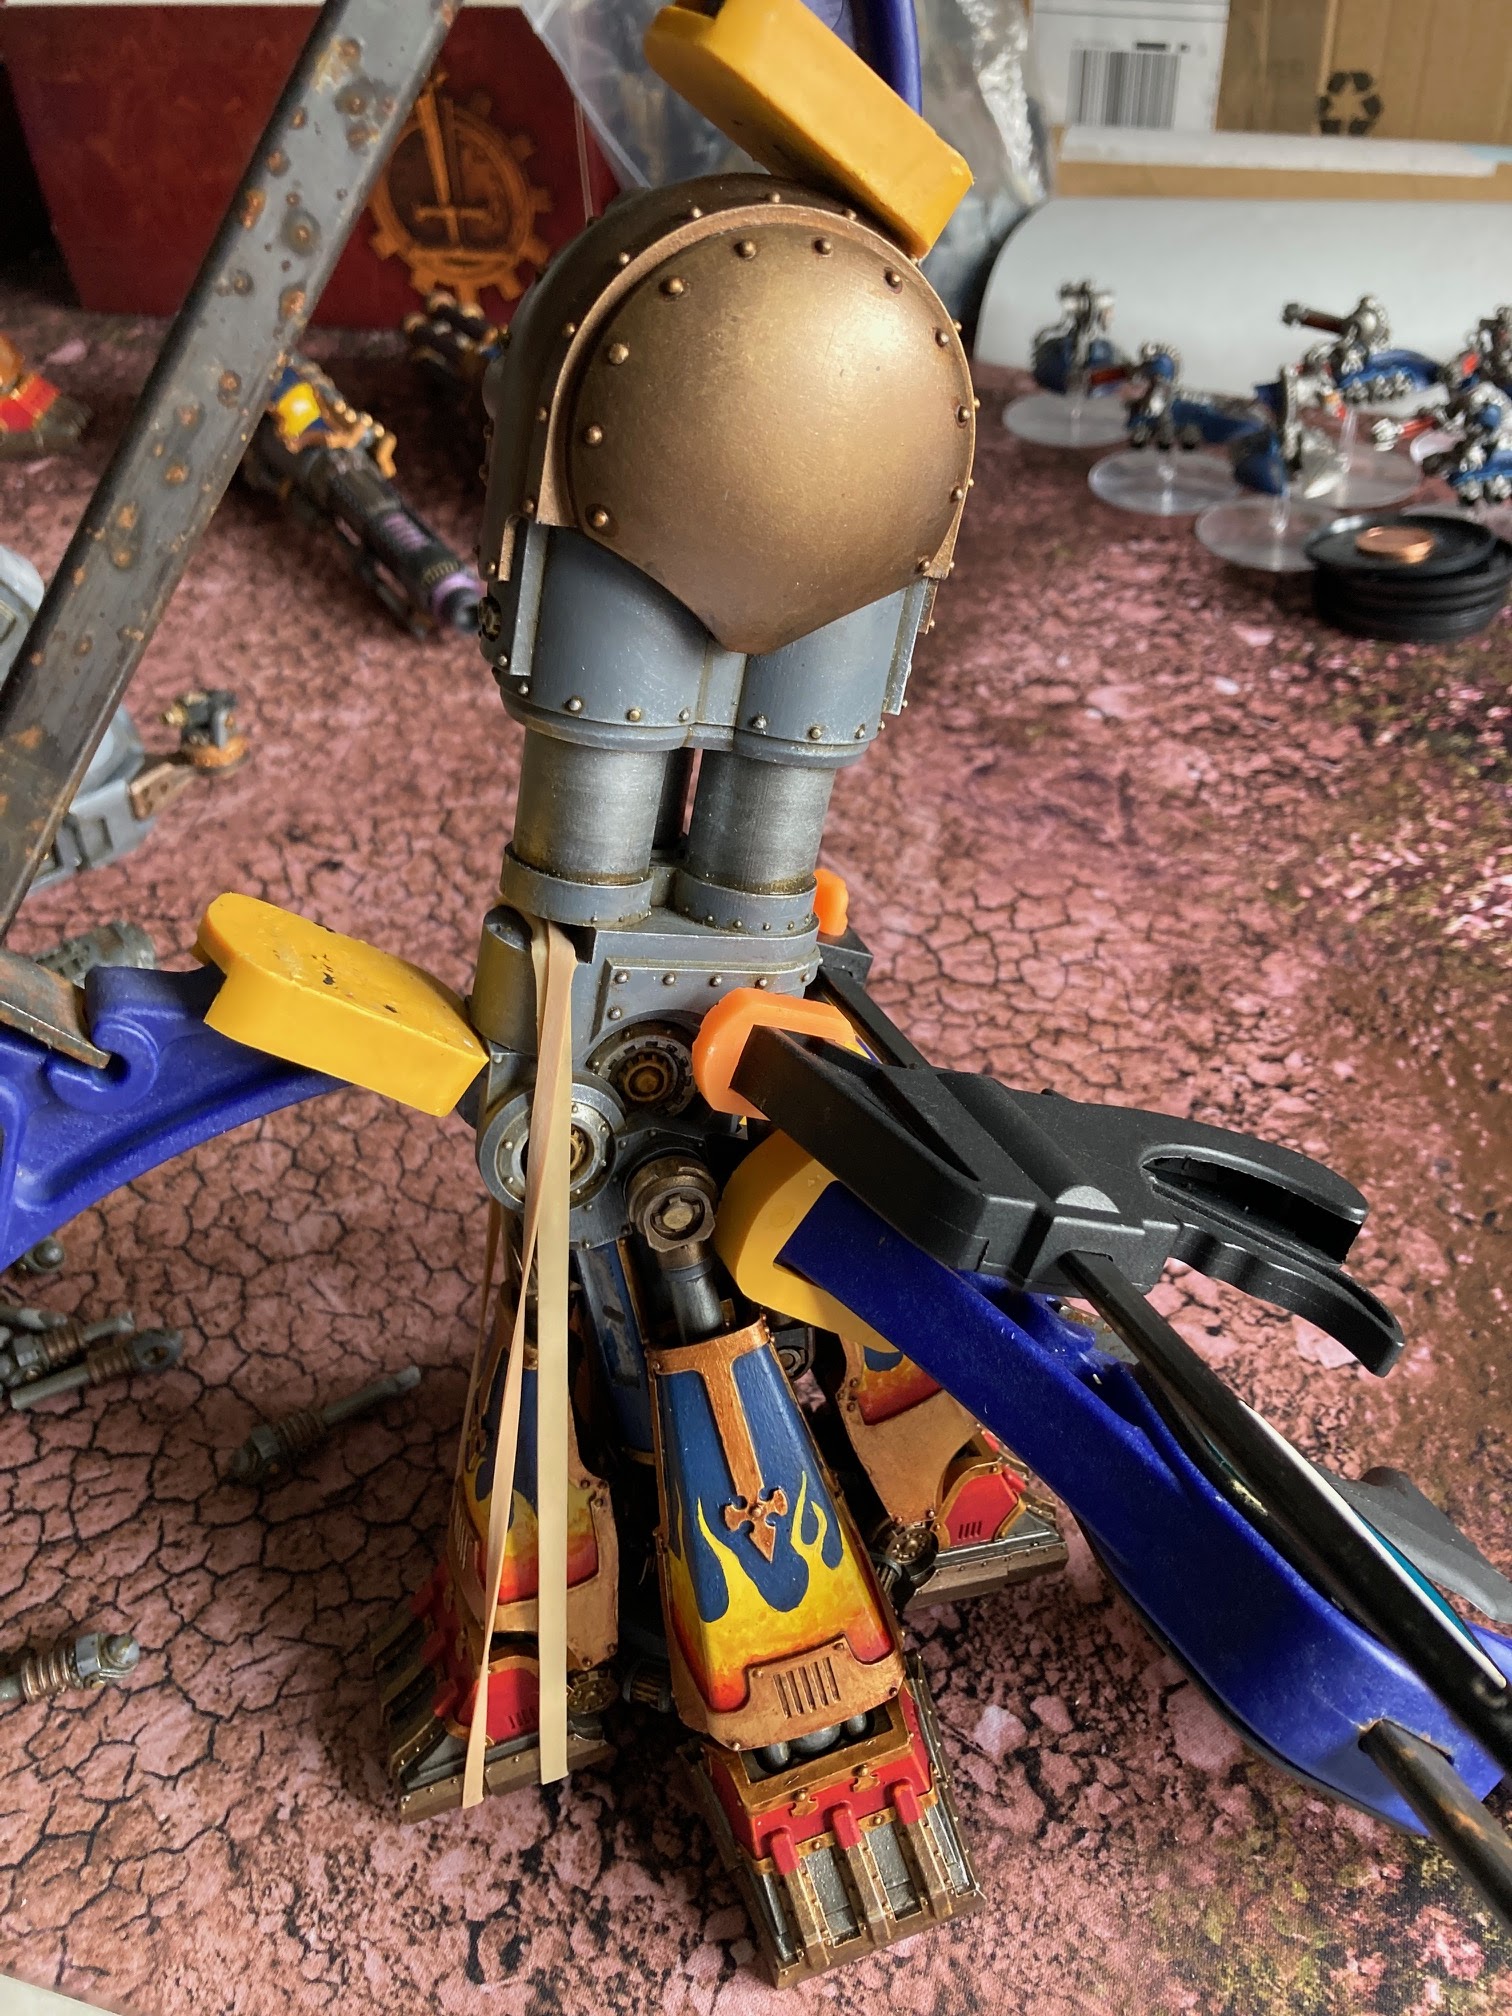
16 Sept 2024

Legio Astorum Forge World Warbringer Nemesis Titan - WIP #3 - Banners

Hello Titanseers, welcome and thanks for reading. The re-paint of the Warbringer rescue continues, but a few new additions. The spare banners from the new(ish) Cerastus Knight Lancer makes a great weapon kill banner. I used two small 2mm x 2mm diameter magnets recessed into the gun assembly and two mounted on the banner chains.
This means it is removeable for transport as it will be quite exposed and easy to snap off.
The Kill Markings on the banner denote crossed-axes for Warlord kills and the double-headed axe for Battle Titan kills. 
Whilst I was doing banners I thought I'd progress with the titan groin banner, these were printed off by Drake Seta (Battle Bunnies Blog) and adapted from the Reaver banner, name blanked out and a few markings blanked out to be different from the other banners. The finials were from the plastic skulls set and the chain is steel so they stick to the magnets on the groin of the titan. The banner was finished off with some washes at the bottom to show wear and tear. The paper was wrapped around a rivet pin and glued with watered down PVA which also stiffens the paper and keeps the fold.

Thanks for stopping by, cheers, Princeps Seniores Siph

9 Sept 2024

Legio Astorum Forge World Warbringer Nemesis Titan - WIP #2 - Legs

Welcome Titanseers, I progress with the Warbringer Nemesis Titan build, from the bottom up, I have completed the eight toes and toe pistons re-paint, now prepared all the joining surfaces and started the construction proper. Here the thigh is being set to the lower leg, its pinned at the knee, the thigh piston to hip socket and knee gears into to the lower leg. The pose is a slight lifting of the foot so more dynamic than a simple stand.
The elastic bands keep the seal whilst the two part epoxy dries, I am using JB Plastic Weld again, its superb. The pin to the knee gears can be seen above. The slot is where the knee armour gets placed.
The shin armour is also glued, the surface is small and is supplemented with a brass rod pin.
A lot of weight and forces go through the hips. The hip socket has been prepared, bare resin exposed and roughened and the addition of two pins will strengthen and prevent twisting. The opposite hip was still attached and not able to be broken apart so its fairly strong, so I added two pins into it (seen above) in the socket to make sure, also the two pins in the hip flex coupling were marked with paint and then I knew where to start drilling (the black and grey spots above).
Now drilled, when glued and clamped the hip will be a strong solid piece. I then have to pin the legs to the other end of the flex-coupling, and pin twice to prevent rotation - this is where Reaver Honorum build failed after several car journeys. Now repaired with pins and stronger epoxy, its a solid Reaver.
I preserved the flames from one thigh armour plate, but painted blue - this echoes the flames on the toe piston armour and one of my vassal Imperial Knights. I like to preserve and adapt the previous history of my rescue Titans.
Here is the lower leg assembled, just the armour plates to glue and clamp in place once the thigh and hip socket part is attached and dried.
Some of the prepared armour plates and knees.
Here's a mock up of the standing pose, one leg is starting to lift, the heel of which has a plastic spacer so the weight of the titan is not on the toes but through the foot into the base (to come). This way the titan can be screwed to the base without stressing the toes joints and makes a more stable and solid build.

Cheers for dropping by, Princeps Seniores Siph

6 Sept 2024

Lord TITANium - Warlord Titan #2 - Psi-Titan WIP

Hello one and all!

Up this week for your viewing is my next Warlord Titan, however I'm pushing the boat out and going all in for a PSI TITAN at 28mm scale. For this, I will be doing bespoke 3D printed parts for the Titan, including armour plates, weapons and psi-matrix crown, as FW/GW do not support 28mm Titans fully.

The build was ok, with the model pinned in all the places possible to help support the model. I have printed a portion of a 28mm printed Warmaster carapace for the Titan to be standing on. 

I've opted for a colourshift paint for the armour panels, using a matt black base, then a gloss, then several passes with the colourshift. The plates will also have silver trim, which I think will fit better than a gold scheme. 

So far the model has Apoc Missiles for the carapace, but I might also print some Gatling Blasters if the Titan is to be used 'more upclose' 

I've also printed a Heavy Volkite and a C-Beamer for the model, as well as a CC option.. more to follow soon.

 LH

3 Sept 2024

Legio Astorum Forge World Warbringer Nemesis Titan w/ Belicosa Volcano Cannon - WIP #1

Hello Titanseers, another great Forge World Titan on the workbench. This was a rather nice find on eBay as a rescue Titan. The previous owner fortunately (for me) had got about 99% completed before disaster had struck and the titan came apart, probably from a fall or a joint failure. Losing hope they put it for sale I think and I picked up a bargain.
Now this is entirely speculation based on what I can see, a repair job in the sockets, greenstuff useage and obvious failure caused by ill-preparation of building the titan - no joints have been surface prepared or stripped of paint - if you do this the only thing the epoxy or glue is bonding to is the thin paint layer. Hence it looks like that caused failure, above you can see the layer of epoxy I peeled off with ease. I was able to twist apart most pieces.
The original Titan was painted like the Forge World promotional Titan (which can still be found in Warhammer World) in traitor Legio Fureans colours so I will be using a little of this preserving the flames on the toe armour but altering this to Legio Astorum colours. The rest of the Fureans scheme will be obliterated for the loyalist Legio Astorum blues and golds.

Cheers, Princeps Seniores Siph
Blog Widget by LinkWithin