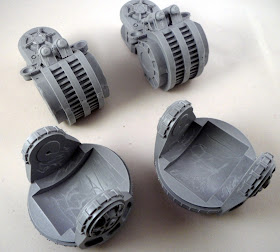
Welcome Back Readers, Thanks for dropping in for the next installment of the titan build. Here I start the arms, I have already glued and dried the Upper Arm Pistons to the Upper Arm. Next, the Elbows are glued and clamped to the Upper Arm assemblies.
Once dry, the next day I can Arm assemblies into the Shoulder Joints, after roughing up the surface to maximise the surface area for the JB Weld to affix to. There will be a lot of weight pulling this join apart with the weight of the Titan Arm Weapons below it.
To assist the glue, I clamped the sides onto the Upper Arm so I have now three surfaces of glue affixing the arm into the socket.
Here is a shot of the pin going in place, through the Shoulder Joint and into the Upper Arm. The whole Arm will be further pinned from a pin reaching through the entire assembly from the Shoulder Mounts, through the Shoulders themselves and in through the Shoulder Joints and into the Upper Arms. I am planning on magnetizing the weapons in place using a magnet up in the lower arm coupling and in the top cog of each weapon - yet to purchase the Arm Weapons.
The arm assemblies were then glued and clamped into the Shoulder and at a slight angle, so the weapons would point out at the front of the titan roughly ten degrees from straight forward - test pose this desired angle before gluing and clamping in place. Once dry, you can go ahead and glue the two sets of Shoulder Pistons.Cheers, Siph.


Getting there! To be honest I thought the construction stages were the most fun!! And it gives you plenty of time to think about your colour scheme!
ReplyDeleteI just finished up the arms yesterday! Loads of pinning and gluing, but they should be pretty solid (I hope). I'm looking forward to seeing what you do to attached the weapons : )
ReplyDeleteI see you are trying something different with the arms. I look forward to seeing how it works.
ReplyDeleteKeep up the good work!
I think I'll be copying GunGrave with the arms but embedding magnets up the inside of the elbow recess so they don't droop. The pin across the cog of the elbow will hold the majority of the weight, allowing the magnet to do its job I reckon.... We'll see.
ReplyDeleteThat does look like the most awkward, least fun bit so far.
ReplyDeleteCheers guys, @Zzzzz, it's all great, I'm enjoying it immensely.
ReplyDelete