I bought a simple spirit bubble level to check the pose, an upright set of hips and waist will not put stress on on or the other leg so they share the top weight of that huge torso and arms.
One final check before gluing commenced.
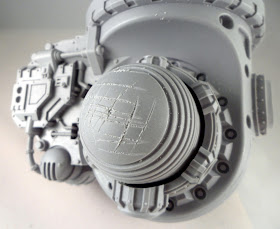
Once glued, I clamped carefully, avoiding moving the joints, this was quite fiddly and took the time that the glue starts to harden, once this happened the job became easier as the clamps wouldn't try to straighten the angles etc.Here is a pic of the scoring I did on the hip ball joints before gluing, to maximise thesurface area to glue and form a better join.
I did the same to the hip sockets too. I just use the back edge of the sprue clippers.
And here is the result, a nice manly walking pose with the legs slightly apart to allow passage of the toes past eachother. The pistons (12 of them) were done over a course of 3 days, each day doing a set of pistons and leaving the legs to set before the next set, otherwise they might fall out of the sockets. These pistons were cut to size for the top of the legs where the gap is smaller, test fit before cutting and make sure you site them into the correct sockets. These pistons further support and steady the hip sockets so now there is 7 points of contact for each leg to the hips, hence the earlier step of gluing the hip piston ring.
The trailing foot slightly lifting from the rear as the leg is bought forward.
From the side, I chose mainly for height, the rear leg toes in line with the rear of the front foot, walking, not running but not shuffling either - this is why dry fitting before hand and double checking is important.
And the other side
The next day when completely firm, I drilled right into the hip ball and hip piece with an extra long 11cm drill bit. This will ensure the pin enters the hips as well as the hip ball joint. A second pin could be used at 90 degrees to this one or in paralell if you worry about rotation, but I think the glue is actually sufficient to hold it by itself - the pinning is more for my peace of mind.Once the pins are glued in place, the horizontal gyros are clamped and glued over the pin site to finish off the legs, well with the exception of the armoured toes and armour plates which will further support the foot ball joint to really make the titan safe and steady.
Thanks for dropping by, I hope someone finds these step by step posts useful. Cheers, Siph.


Loving seeing this come together - the attention to detail on the build is going to pay off in spades. Keep up the great work, man!
ReplyDeleteIt progressing really well, I will be using this as reference when I truly start mine.
ReplyDeleteEspecially impressed by the spirit level to ensure equalisation idea. Bravo
ReplyDeleteCheers everyone, glad people will find the step by step useful. I'll also do a round-up post with a link to all the posts for ease of reference.
ReplyDelete