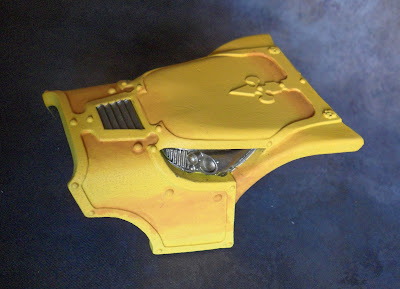
Hello Titanseers, thanks for dropping by. The next instalment of my Warhound journey is dealing with the head and spare weapon and the base to make the legs super stable and strong. Above shows the head armour cowling sprayed with Army Painter Daemonic Yellow and some pre-shading of blended Averland Sunset to form the darker areas. The eye optics were custom resin eyes to replace the plain plastic 'window' lenses.
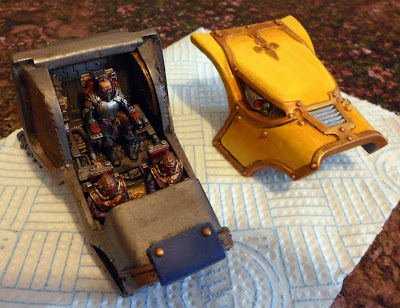
Once I gave the head two thin coats of Forge World Sigsmund Yellow Clear paint it gives a really rich yellow over the spray and pre-shading. I then did the trim with Vallejo Brass and Reikland Flesh Shade and lined with Citadel Black Ink. I also did the Princeps and Moderati, the previous owner had a basic scheme for the Princeps and Moderati were not yet painted or fitted, I also repaired the headrest on one seat.The eye sensors look great, and fit in with the aesthetic of the Warlord and under the Reaver eye lenses. The astute among you may recognise the cabling on the neck - it was missing from the second-hand job, so I chopped up some Necron Tesseract Vault cabling to fit into the cable glands on the head and torso.
The neck is magnetised hence the fitting one end only. The armoured studs on the face and trim were highlighted with Auric Armour gold to brighten them.
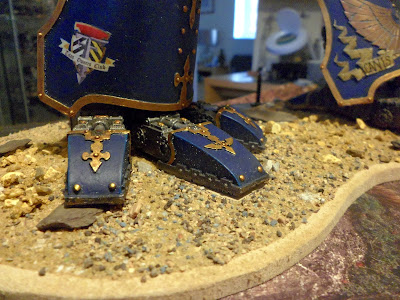
The base is 6mm MDF cut and sanded. I then marked out where the titan physically connects to the base, the Warhound is a nimble Titan, so not flat footed and up on raised toes. I had some great black screws from a plastic shed build so ideal for fastening the resin foot to the base, these will take the majority of the loading meaning the toes won't be stressed too much.
Using a Forstner bit, on the underside I made a recess for the screw head so the base sits flush.
Once I applied PVA and sand and sealed with diluted PVA, I painted the gravel leaving the connection points free for a strong bond.I positioned rocks where the toes had been modelled slighty raised (the original base had craters in which the feet sat), this actually looked great and made the feet look natural and 'blended' into the base.
The other foot, again with natural slate chips - they will be left natural, just sealed with varnish. The toes will be epoxy resin glued to base and slate chips.
The completed base, with tufts and drybrushing applied. The feet will be sealed with matt varnish along with the base whilst the rest of the titan gets a clear satin lacquer, this makes the feet look 'dusty' compared to the armour plates.
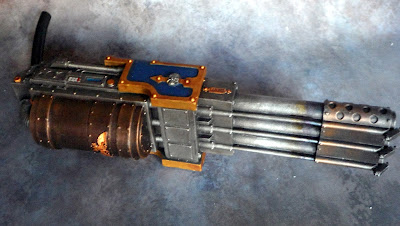
The Inferno Gun, I bought this new to supplement the armament as Canis Bellum has already got a Turbolaser Destructor and Vulcan Mega Bolter, so a nice big flaming death template (in AT28mm its flipping huge cone!) is called for!I did some rather nice (imho) heat staining on the barrels and burn marks on the muzzle guard, this was 4 washes (L-R Sepia / Leviathan Purple / Drakenhof Nightshade / Nuln and brasswork was Balthasar Gold / Warplock Bronze / Abaddon Black) and the edges were brightened with a quick light Leadbelcher drybrush.
The magnet was drilled into the arm which was cut down flush to the weapon. I also used some of my flexible rubber skipping rope as power cable to disappear into the 'armpit' of the carapace.
Just construction and sealing to do. Next post will be the completed Titan and Scout Maniple! (Yes, I now have a squadron of Scout Titans!?!)
Cheers, Siph.


So...many...great...titans. My hat is off to you. That Last Warhound for the maniple is coming out so well!
ReplyDeleteDammit ! Wonderful.
ReplyDelete